Time to sew. Posture is important, relax your shoulders, your neck and sit up straight in your chair. Good lighting is a must, invest in an Ott light if there isn't enough lighting in your sewing area. Remember to take breaks, get up and stretch. This "hobby" can be grueling on your body. Before we begin I wanted to show you this tip...I wrap a piece of dryer sheet around the very first loop that my thread passes through. This helps keep the amount of lint that ends up in the bobbin case somewhat under control.
Today let us practice those same E's and C's we have been drawing on paper. First the cursive E. Do not focus on speed, foot pedal or the length of your stitches, that will come in time. Concentrate on the smoothness of the maneuvers you are making. Picture those cursive E's as you move your fabric around and around. Fill that sandwich with them.
When you have finished either change sandwiches or continue on the same one and start practicing your cursive C. It can become an S if you like just work on those curves, smooth them out. That may mean slowing down as you approach the curve or barreling through it. Just fill your work area with them.
I do not have any tricks to make you a really good quilter. This is something that takes hours a day of practice. Yes, you heard me hours. But as you get comfortable with the alphabet its time to start working on those stitches. You will have a nice stitch when the speed of your hands meets the speed of your foot pedal, you can almost hear it happen.
The stipple-when you are ready start turning the C's into the most common of the meanders the stipple. This "puzzle piece" design is meant to fill large areas of quilts. The thing I think about the most when doing mine is "Don't cross your lines" and "Don't stitch them in nice neat even rows.
Your E's will eventually become a meander that looks like this. I use it quite often in one form or another.
Once you have mastered the E meander you can add a star. Just like the ones you did in grade school.
Or a flower with a leaf, the options are endless with this meander.
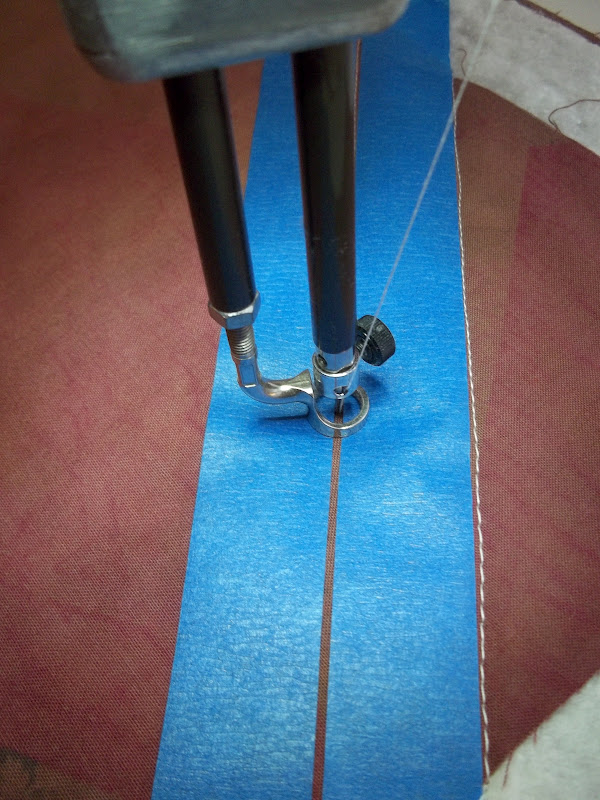
Before we end for the day I wanted to show you two techniques for sewing straight. The first is used when making grid lines on a quilt. Use blue painters tape to mark the quilt top. I only use a few pieces at a time because they tend to peel up if the quilt is large.
When you pull the tape off you have a nice straight grid, in even rows.
Lastly, use your walking foot to stitch in the ditch or around your blocks. Its a great way to highlight the work you have done on those blocks.
Well, we have one lesson left. I hope you come back on Friday for graduation. Take care,
Laural


2 comments:
Thank you Laurel, I have a busy day today but will get my practice time in. I have enjoyed this week of tutorials and pictures. By the way, I made a name change to my blog , it will now come up as American Vintage Quilts.
Did my homework today, it went well at first but I still have a hard time making my puzzle pieces large enough and trying to keep them round. I found that it was better to concentrate on puzzle and save loops for later. More practice, it's a long slow road. Thanks you for sharing this tutorial.
Post a Comment