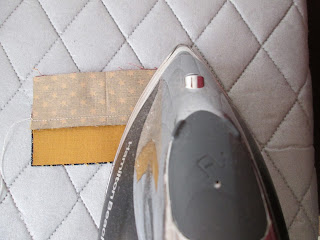
Determine which blocks you wish to sit next to each other, in both rows. With right sides together sew 1/4" seam allowance on both strips.
Open the strips, but do not press them open yet.
With right sides together, lay the two strip sets on top of each other. Making sure that once they are sewn, they reflect the way you want your block to come out.
Use your fingers first to move the seams in the opposite direction of each other. Set those seams with the iron. Adjust them to lock into each other. You should feel a smooth transition over the seams when this has been done correctly.Time to cut your strip sets. Cut at your individual block size, in this case 1 1/2". You may have to trim off uneven fabric at the beginning of the strip set. Continue cutting, without moving your sets, until all have been cut.
Take your four patch sets to the sewing machine and sew a 1/4" seam allowance.
Take a peak to make sure your points match at the center, and those sure do!!
Turn block over and twist the seams in opposite directions so that you form a tiny 4 patch from the back.
Like so...press with iron to set.
Square your block up to cut size, in this case 2 1/2" which once sewn will finish 2".
You will have to stay tuned for the finished quilts that these little guy will be sewn into. I plan on having a dozen new designs for Quilt Market in October, gulp. Thank you for your patience with Simply Put over these past few months. My dad's death impacted me and my family so severely I wasn't sure I would continue designing or pursuing this business, which he so lovingly supported. Being up there this past week for his memorial has helped me figure at least the next few months out. When all else fails, keep sewing. Laural


4 comments:
Very nice tutorial and a nice way to do small squares.
I like how you pressed the center, prevents the bulk.
Debbie
Great tutorial.
Hi Laurel, I'm so sorry about your Dad'd passing, it gets better. My my just died this year too. Don't make any big decisions for awhile. I know you have had some hard times, but you have prevailed and look at all you have accomplished! I believe quilting is your safe harbor. With kindest regards, hang in there. Your friend, Marylin Angeloff
Excellent tutorial. I'm so sorry about your dad. My father has been gone 3 years and I'm just now getting used to his absence. God bless you and yours.
Post a Comment